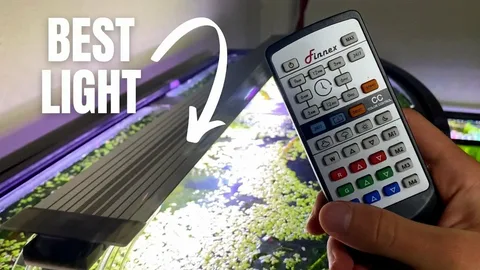
If you are searching for the finnex 44/7 hlc remote setup guide pdf, you likely want clear, direct instructions to properly configure your aquarium lighting system. Follow this comprehensive, imperative guide to correctly set up, program, and optimize your Finnex HLC light using the remote control. Avoid guesswork. Apply each step carefully. Save this page as your working reference in place of the finnex 44/7 hlc remote setup guide pdf.
The HLC lighting series is manufactured by Finnex and is widely used in freshwater planted aquariums. Configure it correctly to ensure healthy plant growth, proper light cycling, and stable aquarium conditions.
Understand the Finnex 44/7 HLC Remote System Before Setup
Begin by identifying your components. Confirm that you have:
-
The HLC LED light fixture
-
The infrared (IR) remote control
-
The power adapter
-
Proper mounting brackets
Locate the IR receiver on the light fixture. Keep this area unobstructed. Maintain a clear line of sight between the remote and the receiver at all times.
Install batteries in the remote. Remove any plastic battery tab. Test functionality by pressing the Power button while pointing directly at the receiver. Confirm that the light responds immediately.
Recognize that the term “44/7” commonly refers to the 24/7 automated lighting cycle. Understand that this mode simulates sunrise, midday, sunset, and moonlight phases automatically. Use this feature to maintain a natural lighting rhythm.
Install and Position the Light Correctly
Mount the light securely above your aquarium. Adjust the brackets so the fixture sits evenly across the tank.
Follow these installation steps:
-
Place the light on a stable, flat aquarium rim.
-
Ensure adequate airflow around the unit.
-
Avoid covering ventilation areas.
-
Plug the adapter into a grounded outlet.
-
Avoid using extension cords if possible.
Position the light at the correct height to prevent excessive algae growth. Keep it level to ensure even distribution of light intensity.
Do not power on the unit until installation is complete.
Activate and Configure 24/7 Mode Properly
Use the 24/7 function to replicate a natural day cycle. Follow this exact sequence:
-
Press the 24/7 button once.
-
Select the current time segment (such as 6AM, 9AM, 12PM, etc.).
-
Adjust each color channel (White, Red, Green, Blue) using arrow controls.
-
Press 24/7 again to confirm and save.
Set realistic brightness levels. Avoid setting maximum intensity unless necessary for high-light plant systems.
Program each time block individually. Increase brightness gradually from morning to midday. Reduce intensity during evening periods. Maintain minimal blue light during nighttime settings.
Store your programmed cycle. Allow the system to run uninterrupted.
Customize Color Channels for Optimal Plant Growth
Adjust individual LED channels to fine-tune spectrum balance.
Follow these configuration guidelines:
- Increase White for overall brightness.
- Increase Red to promote plant growth.
- Adjust Blue moderately to control algae.
- Keep Green balanced for natural coloration.
Avoid extreme color saturation. Maintain balanced output to prevent plant stress.
Test your configuration for at least one full cycle before making further adjustments. Observe plant behavior and algae response.
Keep written notes of your settings. Refer back to them if needed.
Manually Control Brightness and Special Modes
Use manual mode when testing lighting effects.
Press the color channel button you wish to modify. Increase or decrease intensity using the arrow buttons. Save settings when satisfied.
Explore additional preset modes if available. Some models include:
- Cloud simulation
- Thunder effect
- Gradual dimming
- Sunset transition
Use special effects sparingly. Do not rely on them as your primary lighting schedule.
Return to 24/7 mode after experimentation to maintain stability.
Troubleshoot Remote and Setup Issues Immediately
Resolve issues quickly to avoid lighting disruption.
If the remote does not respond:
-
Replace batteries.
-
Stand closer to the unit.
-
Remove obstructions.
-
Clean the IR receiver.
If the light resets after power loss:
-
Reprogram the 24/7 schedule.
-
Avoid frequent unplugging.
-
Use a surge protector for stability.
If brightness appears inconsistent:
-
Check power connections.
-
Reset the system.
-
Reconfigure each time segment.
Keep the fixture clean. Dust buildup reduces efficiency. Wipe gently with a dry microfiber cloth.
Download and Save the Finnex 44/7 HLC Remote Setup Guide PDF
Search for the official finnex 44/7 hlc remote setup guide pdf on the manufacturer’s support page. If a model-specific PDF is unavailable, download the closest HLC series manual.
Visit the official instruction section:
Download the correct HLC model manual. Save it to your computer or phone. Print a physical copy for quick reference.
Use the PDF to verify button layouts and safety instructions.
Keep documentation stored safely.
Optimize Long-Term Performance and Light Stability
Maintain your lighting system properly.
Follow these best practices:
-
Keep a consistent daily schedule.
-
Avoid frequent reprogramming.
-
Monitor plant health weekly.
-
Adjust intensity gradually.
-
Clean fixture monthly.
Use a timer backup if necessary. Protect the system from power fluctuations.
Observe fish behavior. Excessive brightness may stress aquatic life.
Reduce intensity if algae growth increases significantly.
Perform adjustments incrementally. Never make drastic changes overnight.
Maintain Safety and Electrical Precautions
Follow all electrical safety protocols.
-
Keep plugs dry.
-
Prevent water contact with cords.
-
Create a drip loop below the outlet.
-
Unplug before cleaning.
-
Do not modify wiring.
Inspect cables regularly. Replace damaged components immediately.
Ensure stable voltage supply.
Avoid DIY modifications that void warranties.
Use This Guide as Your Primary Reference
Apply this complete instructional guide in place of the finnex 44/7 hlc remote setup guide pdf if you cannot find the exact document. Follow each configuration step carefully. Confirm changes before moving to the next setting.
Revisit this guide whenever you need to:
-
Reprogram the 24/7 cycle
-
Adjust color channels
-
Troubleshoot remote issues
-
Restore factory settings
-
Improve plant lighting conditions
Maintain consistency. Observe results. Adjust gradually.
Configure your Finnex HLC light correctly and maintain stable lighting conditions to support healthy plants, controlled algae growth, and balanced aquatic ecosystems.